


Months ago, while building a web-based project and this particular section needed a QR code scanner to implement.
About 2015 or so, this would have been not possible because that is a feature only native apps possessed , but thanks to the beauty of evolving JavaScript, we now have the power in our hands💪. It is one of the fastest ways options to use for the web.
I had to go through a lot of trouble though, deep searching to find the code so this article here is to lessen the search in case there is someone out there facing similar issues.
What we need is a js library capable of interpreting QR code so let's get to it.
First, we will need to create our HTML file index.html
CREATE HTML FILE
Input this code in your file
<div class="scan-body">
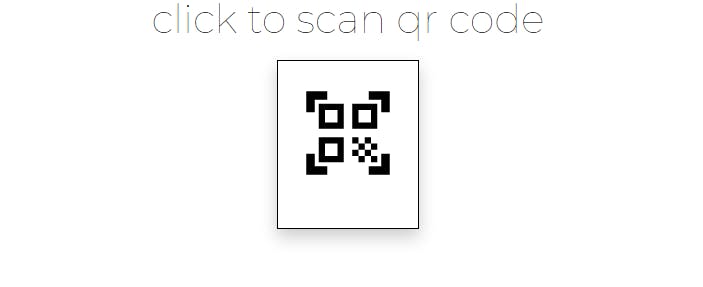
<p>click to scan qr code</p>
<i class="scan-icon" id="scan"
><span
class="iconify"
data-icon="ic:baseline-qr-code-scanner"
data-inline="false"
></span
></i>
</div>
This block of code is just for visual enhancement and styling. Right underneath your block of code write this too.
 <div class="camera">
      <canvas hidden="" id="canvas" class="qr-canvas"></canvas>
      <div id="result" hidden="">
        <b>Data:</b> <span id="output"></span>
      </div>
    </div>
This block is for creating the canvas section on which the camera will be displayed on and the corresponding data received after the code has been scanned.
The next step is to add basic styling by creating your style.css file
CREATE CSS FILE
html,
body {
  font-family: "Montserrat", sans-serif;
}
.scan-body {
  text-align: center;
  margin: 40px auto;
  font-size: 40px;
}

.scan-icon {
  font-size: 100px;
  border: solid 1px #000;
  padding: 25px 20px 20px 20px;
  box-shadow: 0 8px 16px 0 rgb(0 0 0 / 20%);
}

.qr-canvas {
  position: absolute;
  left: 0;
  margin: 0 auto;
  width: 100%;
  max-width: 400px;
}
#qr-result {
  font-size: 1.2em;
  margin: 20px auto;
  padding: 20px;
  max-width: 700px;
  background-color: #fff;
}

.camera {
  text-align: center;
  position: relative;
  top: 50%;
  left: 50%;
  transform: translate(-25%, -50%);
  font-size: 40px;
}
It should now look a little bit better
Next we add some javascript !
First off,remember that library we talked about? We will need it about now. Make sure you include this script tag at the bottom of your code before your tag.
<script src="https://rawgit.com/sitepoint-editors/jsqrcode/master/src/qr_packed.js"></script>
and this for your qr code iconify to show
<script src="https://code.iconify.design/1/1.0.7/iconify.min.js"></script>
CREATE JS FILE
lets write some code in our file
let qrCode = window.qrcode;
let scanIcon = document.querySelector("#scan");

const video = document.createElement("video");
const canvasElement = document.getElementById("canvas");
const canvas = canvasElement.getContext("2d");

const qrResult = document.getElementById("result");
const outputData = document.getElementById("output");

let scanning = false;
Explaining the code, the first line fetches the QRcode object from the windows and assigns it to a variable to be used later. The second line catches the QR code icon in the HTML to be used for an onclick function to run the whole process of activating the camera. The third line creates a video element to handle images coming from the video The fourth line gets the canvas element and assigns the 2d context to a constant.
This is needed to draw the images on the canvas section we created
We then grab the other elements to display the results of the scan.
Next, we add the following block of code to the bottom
qrcodeii.callback = (res) => {
  if (res) {
    //in here you can pass your data  "res" to an endpoint or something
    outputData.innerText = res;
    scanning = false;

    video.srcObject.getTracks().forEach((track) => {
      track.stop();
    });

    qrResult.hidden = false;

    canvasElement.hidden = true;
  }
};
In this code, we assign the callback function of the QRcode object. This will be fired when it detects a QR code. It provides the parameter containing the result of the scan, which you can use to pass into an endpoint.For us, we will just output it.
we set the scan variable to false, to avoid it from scanning again after the QR code has been detected.
We then stop the tracks from the stream in the video element. Then we display the response on the screen for the user to see, right after hiding the canvas element
Now all is left is to access the web camera and usea loop to get the image to our canvas after every frame. The second loop scans for the QR coodes every milliseconds. We attach the onclick event to the icon we grabbed earlier.
scanIcon.onclick = () => {

  if (navigator.mediaDevices) {
    navigator.mediaDevices
      .getUserMedia({ video: { facingMode: "environment" } })
      .then(function (stream) {
        scanning = true;
        qrResult.hidden = true;

        canvasElement.hidden = false;
        video.setAttribute("playsinline", true);
        video.srcObject = stream;
        video.play();
        tick();
        scan();
      });
  } else {
    output.innerHTML = `Sorry, Your Browser Cannot support this feature`;
  }
};
Lets explain the above
The getUserMedia function takes an object as a parameter, which we’re passing the video object with the facingMode set to "environment". This means that if the user is using a mobile device, this will attempt to use the back camera. The playinline attribute,if true tells the ios browser to not set the camera if full screen.
To define tick function and scan function
so we’re calling the tick function to draw the stream every frame, then the scan function to trigger the algorithm.
function tick() {
  canvasElement.height = video.videoHeight;
  canvasElement.width = video.videoWidth;
  canvas.drawImage(video, 0, 0, canvasElement.width, canvasElement.height);

  scanning && requestAnimationFrame(tick);
}
We set the height and width of the canvas to the dimensions of the video. we use requestAnimationFrame and pass in the tick function so that it will be called again when the browser draws the next frame. This is done conditionally, of course.
function scan() {
  try {
    qrCode.decode();
  } catch (e) {
    setTimeout(scan, 300);
  }
}
We run the decode function from the qrcode library, which will look for a canvas with an ID of "canvas" and scan its contents. If it doesn't find anything, the error we defined will be caught and we’ll call a setTimeout to scan in 300 milliseconds. You can set this to something else to see what happens.
All done. You can now test your app in your browser. I hope this helps someone out there. Ciao!
Font link: https://fonts.google.com/specimen/Montserrat?preview.text_type=custom
Reference from: https://www.sitepoint.com/create-qr-code-reader-mobile-website /